Restoring a classic steering wheel - from old to new
A worn steering wheel is evidence of extensive use by the proud classic car owner, but with its signs of wear and tear and often also cracks, it does not fit in at all with the rest of the well-maintained exterior of a timeless oldtimer or youngtimer. That's why it can make sense to venture a restoration.
This guide will tell you how to go about it and whether you should leave the work to a professional.

Autore: Dylan Smid
Posizione: Vendita
Aggiornamento: 25.10.2023
Restore the steering wheel or buy a new one?
Simply obtaining a replacement for the battered steering wheel can be considered as an option, especially for non-original steering wheels. Most models from contemporary suppliers, Moto-Lita, Mountney, Momo or Booklands, are still available today. Replacements that match the vehicle in terms of sportiness, cut and elegance are available in a wide range. You should reckon with 300-1000€ - depending on the model - for a classic sports steering wheel.
That's why the considerably cheaper option of restoring the steering wheel yourself, at around €50, is often the obvious choice - for enthusiastic hobbyists anyway, who like to restore like the professionals.
Not all types of steering wheels can be restored using the do-it-yourself method. Pulling the steering wheel off the hub is usually still one of the easier exercises.
When does it make sense to restore a steering wheel?
Restoration is not a problem if there are minor defects - for example, scratches, cracks or signs of wear. With the right steps, informed know-how and a little skill, such defects can be quickly eliminated.
- Leather steering wheels consist of a metal core with a shaping cover. This is then covered with leather. Damage to the leather cover can be easily repaired.
- Wooden steering wheels consist of metal with a wooden cover. Damage to the wood can be easily repaired.
- Plastic steering wheels also consist of a metal core and a coating of thermosetting or thermoplastic material. Plastic steering wheels are often the original equipment and are correspondingly rare in good condition. Original Bakelite steering wheels are very costly to restore, while thermoplastic steering wheels from the 1950s can also be simply painted.
Here are the possibilities in detail.
Restoring a steering wheel - DIY or with a professional?
Once the decision in favour of restoration has been made, the further question of the process immediately arises: can a classic car enthusiast lend a hand himself or is this an area that should definitely be taken on by a professional?
This is not always easy to assess. Steering wheels have been made from a wide variety of materials throughout the history of old and young cars. Today, classic cars have steering wheels made of hard plastic, wood, leather, chrome, PVC or a colourful mix. Especially with steering wheels that combine different materials (for example, wood on a metal core), special procedures are often required that we cannot cover here. It is therefore not possible to make a general statement about when independent restoration makes sense - it also depends on the owner's judgement and experience.
Accordingly, opinions differ here: a lot can go wrong and a steering wheel restoration - whether it involves cracks, fractures or signs of wear - is still in the best hands with a professional - or is it? However, one should not judge too quickly. If you are well informed at the outset, you can certainly dare to attempt a steering wheel restoration. The right materials and a good hand will help. And this is how it is done:
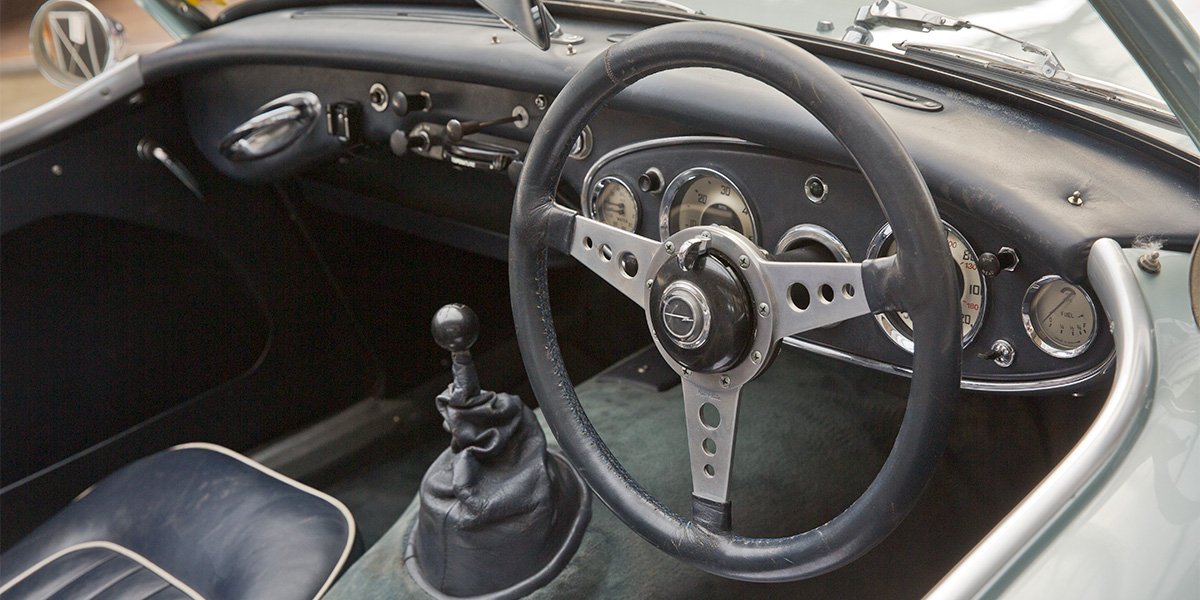
A worn leather steering wheel can be restored easily.
Restoring a leather steering wheel
A high-quality leather look needs to be cared for - even on the steering wheel. Find out here how to restore your worn steering wheel to its former shiny condition. Get yourself a cleaner, leather dye and a moisturising care product, and the restoration of your leather steering wheel can begin:
Tip: You can leave the steering wheel where it is, but it is easier to work on if the steering wheel is dismantled and rests on a firm surface. You will avoid working in constrained positions and running thin fluid aids. Dismantle the steering wheel at the hub, not at the steering column.
Step 1 - Cleaning
Clean the undamaged areas of the steering wheel with gentle leather cleaner so that they are completely free of dirt. Take special care to leave out the damaged areas in the leather so that they do not swell. The damaged areas must be degreased. Use a clean cloth and benzine for this purpose.
Tip: Fatty, i.e. saturated greasy, steering wheels can only be repaired by re-covering them. The indicator is a piece of masking tape. If this no longer sticks to the cover, you should ask a saddler to suggest a solution.
Step 2 - Smoothing
Rough spots can now be smoothed with sandpaper (first with fine grit, e.g. first 120 grit, then 600 and 1000 grit). Remove sanding dust thoroughly.
Step 3 - Finishing the leather dye
Apply the leather dye thinly and in several coats. First check the colour of the leather dye in an inconspicuous place, e.g. the back of the spokes. Repeat the process until the desired opacity is achieved.
Step 4 - Finish
Allow the steering wheel to dry - preferably overnight - in a warm room. Then use the leather sealer to protect the visually upgraded steering wheel from rapid re-wear and thus enjoy your work for a long time.
Note: Shoe polish is not a solution in this case - even if many people claim otherwise. The paint on the steering wheel will rub off very quickly, and you will always be driving with shoe polish residue on your fingers. Shoe polish can, however, be used to make leather areas that have hardened through exposure to sunlight more flexible again. However, the staining problem remains.
Restoring Bakelite and hard plastic steering wheels
After the invention of the first plastic, Bakelite, other plastics also came under this name. Bakelite steering wheels have a metal core and a bakelite or hard plastic coating. The material was so popular because it is heat-resistant and particularly durable.
However, it also tends to crack over the years: Varying expansion at different temperatures or mechanical stresses caused by pulling or pushing on the steering wheel make a repair necessary - or in severe cases even questionable. If a repair still makes sense, a restoration can be carried out with a multifunctional milling cutter, sandpaper, epoxy resin and varnish:
Step 1 – Milling
Generously mill out larger and deeper cracks with a multifunction cutter. Mill down to the original substance.
Step 2 - Remove residues
Step 3 - Fill cracks
- epoxy resin or epoxy compound, the professional solution
- or 2K polyester resin (cheaper than epoxy resin, but has a lower adhesive property, e.g. on metal), feasible if you have nothing else to hand at the moment.
Tip: Simple, straight cracks at the separation points of the steering ring can also be closed with PU sealant: Simply tape both sides of the crack in a ring, inject PU sealant, then smooth with soapy fingers.
Step 4 - Sanding
First roughly sand any protruding areas with the multifunction cutter, then with sandpaper (e.g. first 120 grit, then 400 grit, then 600 grit) until the steering wheel is ready for painting. If your steering wheel has nicks and other damage, sand out to shape as well.
Step 5 - Cleaning and priming
Step 6 - Painting and finishing
Once the primer has dried, you can start painting: Spray on several thin coats of paint or 2-K polyethurane acrylic lacquer at sufficient intervals. The cured lacquer can be polished to the desired shine.
Tip: The rules of a good paint job apply: cleanliness, chemical consistency of the materials used and patience. If you are working in the garage, it helps to run the room with a water spray bottle - this binds the coarsest dust.
Restoring a wooden steering wheel effectively
Scratches, cracks, breaks and dents are just as unattractive to look at in a wooden steering wheel as they are in other steering wheels. Here, too, the question of restoration arises.
With wooden steering wheels, however, restoration is somewhat more difficult. Wood has character - and no two are alike. Whether you have a mahogany steering wheel from Nardi or one made of birch: Before you take the first step, get detailed information from a specialist. If you do not have any experience, we generally recommend that you have the wheel restored by a professional, because adjusting the colour with stain requires a lot of experience. If you still want to take the plunge, your path will be as follows:
Step 1 - Remove the coating
Step 2 - Cleaning
Step 3 - Close the cracks
Step 4 - Fill the cracks
Epoxy can be used to glue the cracks. Don't reach for a 5-minute epoxy for this, though, because you probably won't be doing the whole wheel at once.
Caution: Do not use wood glue, as it cannot withstand the high temperatures in summer.

The alternative to restoration is to buy new: here, for example, from Moto-Lita. This is often easier and offers a more reliable result.
Tip: For smaller imperfections that are not so easy to close, 2-component filler can be used, mixed with stain to the right shade. Set the right colour here first and only then add component 2. However, this process requires a lot of experience or help from a professional (e.g. a carpenter who does restoration work).
If your steering wheel has large imperfections, you can also try to fill them with the right wood or make a filler from the shavings of the steering wheel.
Step 5 - Sanding
Step 6 - Finish
The last step is to finally apply the clear coat. When the first coat is dry, sand again with fine steel wool or 600 grit sandpaper and apply a second coat. The above rules for a successful paint job also apply here.
If you want an authentic, classic look (an old steering wheel would never look like a new one) and can do without a high-gloss finish, you can apply wood oil instead of clear varnish, polish it and then seal it with wood wax.
Conclusion
Whether you decide to equip your favourite classic with an authentic original or with a reworked but equally charming steering wheel is up to you. However, if you are looking to refurbish and embellish the old one, we recommend that you do extensive research on your model and the materials. We will be happy to answer any questions you may have about your model - just give us a call or write to us using the contact form.